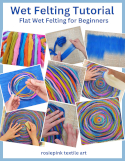
This small purse is a good project for beginners to learn how to make felt and how to make seamless felted items with a resist. Don’t worry too much about how your first attempt turns out, because with any new craft your first piece may be a bit wobbly, but you’ll learn a lot about making felt, so just have a go and have fun!
Materials and equipment needed:
- 100g merino wool top in the main colour – you choose!
- Few wisps of merino wool in accent colours for decoration - optional
- 2 pieces small-bubble, bubble-wrap approx 70cm x 70cm
- 1 piece of small-bubble, bubble-wrap approx 20cm x 20cm
- 2 pieces of tutu net approx 60cm x 60cm
- Piece of thin plastic, 27cm x 34cm – laminate floor underlay is good, but any smooth plastic can be used to make a resist (template that is used to form the bag)
- Bamboo rolling mat – 61cms wide – we use a cheap window blinds with the fittings removed
- Clean, plastic 1 litre milk container with holes punched in the lid
- Bar of soap – olive oil soap is the best, but any soap will do
- An old towel
Before you start you’ll need to prepare your wool, resist and soap solution:
Merino wool top looks like a very loose rope of fibres. Pull off a piece about 90cms long then split it down the middle, lengthwise, to make two easy-to-use lengths.
To pull off a tuft of wool, hold a length 10-12cms from the end, and with your other hand, grip the end of the length between your fingertips and your palm, then pull gently – if you pull too hard the wool will resist you.
This purse will be made from 8 layers of wool fibres (4 each side of the resist) and each layer should use approx 12.5 grams of wool.
Merino wool will shrink by about 30% when it’s felted, but the exact amount of shrinkage will depend on many factors.
The finished size of the purse will be about 19cm wide by 24cm high.
A ‘resist’ prevents two layers of wool from felting together and this is what gives you the ability to make 3D shapes, by allowing wool fibres to only felt together around the edges of the resist.
To make the resist for this purse: Cut a rectangle of plastic 27cm x 34cm, then round the corners as shown in the first photo below. Sharp corners are difficult to felt over.
You may find it easier to cut a paper template first. By folding a piece of paper in half and drawing just one side before cutting, you will get identical sides when you unfold the paper.
To make a soap solution: Get a clean, plastic, 1 litre milk container and punch holes in the lid to make a shaker. Grate a bar of soap to get 2 rounded dessertspoonsful, put it into the plastic container and add a few fluid ounces of very hot water to dissolve the grated soap, then two-thirds fill the container with warm water.
How to make the purse, step-by-step
1. Choose a suitable work surface – one that can tolerate water – and place an old towel on it. Put one piece of 70cm x 70cm bubble-wrap, bubbles up, on the towel, then put the plastic resist in the middle of the bubble-wrap.
2. Pull a fine tuft of wool from your length of roving and lay it on the edge of the resist, half on and half off.
Continue to place tufts, half on and half off the edge, all around the resist like a fringe.
3. Pull a tuft of wool just a little thicker than you did for the fringe and place it at the top left-hand side of the resist, with the fibres running north to south (vertically). Working from left to right, continue to lay tufts of wool to make a complete row, slightly overlapping each tuft.
Keep to within the shape of the resist.
Continue laying rows, slightly overlapping, until the resist is covered.
4. Place one piece of tutu netting over the wool, then sprinkle soapy water onto the wool through the net. The wool needs to be wet but not dripping-wet.
Without disturbing the fibres, carefully place your hands onto the net and push down all over the resist, lifting your hands straight up and placing them straight down, until the wool is flat with no air pockets or dry fibres.
If there is too much water, use a small sponge to mop up the excess – push the sponge gently onto the net in a straight down and up movement.
Going in one direction only and holding on to the net with one hand, draw a bar of soap over the top of the net.
Without disturbing the fibres, gently rub a piece of scrunched up bubble-wrap (20cm x 20cm) in a circular motion over the wool on the resist (through the net) for about 30 seconds – do not rub the fringe.
5. Carefully remove the net, releasing any trapped fibres, then cover the resist and wool with the other piece of 70cm x 70cm piece of bubble-wrap, bubble side to the wool.
You now have a ‘sandwich’ with bubble-wrap under and over the wool.
Gently push down to get a bit of a ‘seal’ and firmly grip the right-hand side of the bubble-wrap and wool ‘sandwich’ and flip it over east to west, supporting the resist as necessary with your left hand, so that the resist is now flipped over but the top and bottom of the resist are still the top and bottom.
Carefully remove the top layer of bubble-wrap, releasing any trapped fibres.
6. With wet, soapy fingers, wrap the wool fringe onto the resist – the edges should not be baggy.
7. Repeat steps 2 – 6 on this side of the resist. You will then have one layer of wool on each side of the resist.
8. Now you need to put one fringe and two layers of wool on this side of the resist.
As before, lay a fringe of wool around the resist.
Cover the resist with rows of wool, but this time the fibres should run west to east (horizontally).
Then make a second layer of rows on top of the first, but with the fibres running north to south (vertically).
Repeat steps 4-6.
9. Repeat step 8. You now have 3 layers of wool either side of the resist.
10. The purse needs four layers of wool on each side of the resist.
To add the fourth layer to this side of the resist, repeat steps 2–6, with the fibres running west to east (horizontally).
The fourth and final layer to the other side of the resist requires no fringe. Just a layer of wool with the fibres running west to east (horizontally). You will get a tiny bit of ‘overhang’ so just tuck those ends round as you did the fringe.
11. You now have a resist covered on both sides with 4 layers of wool.
12. This step is optional – you can add decoration if you choose. There are many ways to decorate felt and this is just one way.
Pull off a lengthwise, very narrow strip of fibres (in a different colour to that used for the purse) to the length you want. Holding one end, dip it through a saucer of soapy water then lay it onto the purse.
Please note that, for clarity of demonstration, the photo shows a much bigger piece of wool being dipped through the water than you would use for the purse.
This decoration is made from seven strips of white with thinner strips of various colours on top.
Place a piece of tutu net over the wool and very carefully draw a wet bar of soap over the top. With the piece of scrunched up bubble-wrap, rub in a gentle circular motion for a minute to set the decoration.
13. This is the next step whether you decorated your purse or not. Cover the purse with a piece of tutu netting and draw a bar of wet soap over the top. Using the scrunched up bubble-wrap, rub it all over in a circular motion for five minutes paying some attention to the edges/sides.
Mop up any excess water with a sponge – as the wool starts to felt it releases some water.
Carefully remove the net, releasing any trapped fibres, then cover with bubble-wrap and flip it over.
14. Repeat step 13 three more times.
15. Now it’s time to roll your purse in the bamboo mat. The mat provides friction to help the wool fibres tangle together.
Lay out the bamboo mat on an old towel and roll one end up tightly to make a ‘rod’ as shown in the photo.
Place one piece of tutu netting on the bamboo mat and place the purse on it then cover with the other piece of tutu netting.
16. Roll the bamboo blind and purse up tightly, like a swiss roll.
Roll back and forth 50 times – count one roll as the distance the mat moves as it rolls from your fingertips to wrists and back again.
Unroll the purse and smooth and flatten it.
Turn it 90° and repeat the rolling. Do this twice more so that the purse has been rolled from all four sides.
Then turn the purse over and repeat the rolling process on that side.
Continue until you can’t flatten the purse anymore i.e. when the resist has buckled because the felt is shrinking.
17. Now’s the time to remove the resist. Using sharp scissors, cut across the top of the bag (through both layers of wool and the resist) along the line that connects the points where the sides curve over (about 1.5cms from the top). The resist will pop out a little now. Make your hands very soapy and rub along the cut edges with your fingertips using small side-to-side movements, on both sides of the bag, in the direction of the cut until the edges seal together.
With very soapy hands, remove the resist and rub around the whole of the inside of the purse for a minute. You should also rub the sides, with one soapy hand inside the purse and the other on the outside, to smooth them.
Put the purse back on the bamboo mat, smooth it out and place between layers of netting. Roll the mat up like a swiss roll, as before, and roll it back and forth 50 times. Unroll the purse, smooth and flatten it, turn it 90° and repeat the rolling.
Do this twice more so that the purse has been rolled from all four sides.
Then turn the purse over, check that the inside is not starting to felt together, and repeat the rolling process on that side.
18. Now take the purse to the kitchen sink. Place a piece of bubble wrap, bubble side up, on the draining board. Draw a bowl of warm water and put the purse in it. When the wool is really wet, lift it from the water and rub a bar of soap generously all over it, inside and out – the soap will prevent friction damage to the felt. Place the purse on the bubble-wrap and with one hand inside the purse, rub it around over the bubble-wrap (like using a washboard on your clothes). This will shrink and harden the felt so be sure to rub the purse evenly all over. After a few minutes you should notice a difference. Rinse the purse in warm water then gently squeeze it out – never wring it.
19. Take the purse back to the bamboo mat. Straighten the purse out and replace it between the netting. Roll, as in step 17, until it’s shrunk to approx 19cms x 24cms. If necessary, you can repeat step 18.
20. When your purse is finished, cut the handles, making the top of the oval about 4cms down from the top of the purse. Rub the cut edges with soapy fingers to seal them.
21. Rinse the purse in warm water until the water is clear. Then soak the purse in cold water, with a generous dash of white vinegar, for 5 minutes. Gently squeeze the water from the purse.
22. Wash the netting and wipe the bamboo mat before giving the bag a final few rolls to smooth it out – about 10 rolls in 2 directions should be enough.
You can also stretch and pull it into shape.
23. Felt will keep the shape in which it’s dried, so dry the purse flat as demonstrated in the photo below. You can make a simple drying rack from a piece of cross-stitch plastic canvas placed on top of a cake cooling rack. Sit in in an oven tray to catch any drips.
The airing cupboard is a good place to dry your purse and when the purse is completely dry it’s ready to use.
This is a very simple felt purse, but having completed it you are now ready and confident to try felting other things or perhaps making a larger purse – have fun!
If you find that your felt purse is not firm or hard-wearing it’s because it hasn’t been fulled enough.
Fulling is the process of shrinking and hardening the felt – merino wool will shrink by about 30%.
If you liked this tutorial you might like our eBook How to Make 3D Felt Vessels that covers different resist methods and vessels of different shapes to really kickstart your adventures in 3D felt work!
 Follow us on Instagram


